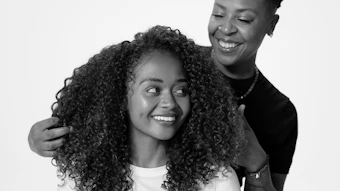
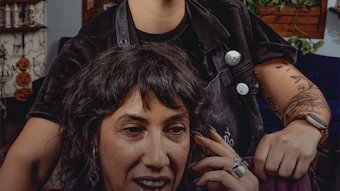
With cold weather setting in, your clients are starting to bundle up, topping off with cozy hats. But those chic beanies can result in some seemingly untamable cases of "hat-head," meaning your clients have to choose between having gorgeous hair, or staying warm. With these simple how-to's by founding partner of the Sam Villa brand and education artistic director for Redken 5th Avenue, Sam Villa, however, it's possible to battle the cold and look chic! Whether topping off with a cashmere beanie, a ski helmet or a wide brimmed chapeaux, it’s all about preventing hat head, either by taking control, or embracing messy hair.
Take Control with a Ponytail
Step 1: Apply Redken Iron Shape 11 to create tact, control, and calm fly-aways.
Step 2: Use a Sam Villa Signature Series Paddle Brush to smooth hair and brush a horseshoe section (from ear to ear) back and hold in place with hands at the back of the head (lower than center).
Step 3: Brush the remaining hair (from the nape to ears) up into hands, switching from one hand to another brushing both sides. Always brush to thumb to control position of ponytail, secure with a bungee or elastic.
Step 4: Wrap a small section from the ponytail around the bungee and secure with a grip.
Step 5: Backcomb tail to create natural texture.
Step 6: Finish with Redken Control Addict 28 to lock in texture in the tail and to control frizz and fly-aways in smoother area of ponytail.
Step 7: Layer smooth area with a small amount of Redken Glass 01 for that ultra sleek finish.
Submit with Messy Waves
Step 1: Use a horizontal section to part off the top and crown areas (they can be combined into one area). Clip hair up loosely.
Step 2: Take another horizontal section from the top of the ear to the other ear to separate the back and sides from the nape area. Clip hair up loosely.
Step 3: Take a vertical section in the nape and elevate 90° from horizontal (size of section depends on the density of hair and volume of curl) smaller sections for thicker hair or more curl - 2-3 large sections in the nape should work well.
Step 4: Spray each section with Redken Iron Shape 11 for hold and heat protection.
Step 5: Hold the Sam Villa Signature Series Sleekr® flat iron parallel over the section - DO NOT close the iron. With the iron still open, flip 180° and move the iron down the section closing softly (more stubborn hair textures will require more tension). The speed determines the curl density – faster for less curl, slower for more curl.
Step 6: Unclip the back and sides.
Step 7: Use the same method as in the nape. Vary the direction (towards the face or away from the face) flip through the back and sides, but make sure to turn the iron away from the face on the front section.
Step 8: Unclip the final area at the top and crown. In the crown area, sections will be pie shaped to maintain a vertical angle.
Step 9: Repeat. If the hat is staying on all day, focus more on the midshaft and ends, because the hat will cover the base. If the hat will be taken on and off, utilize the entire hairshaft.
Step 10: Finish by raking fingers through the waves to break up for a more lived in effect.
Step 11: Spray with Redken Control Addict 28 for moveable control.
[Image courtesy of Glow Communications]
Hairstyles How To: Manage Hat-Head With Cozy, Cute Styles
Nov 19th, 2013