Spring is in the (h)air, which means updos are about to make their re-emergence. Whether it’s for a wedding, school dance, prom or another special occasion, mastering the art of creating flawless hairstyles is essential to ensuring your client feels beautiful on their big day. To enhance your skill set and inspire your creativity, we reached out to a few bridal stylists to provide their expert-led tutorials and business insights on how long it takes them to complete the service and what they charge. Whether you’re perfecting romantic curls, mastering elegant updos or adding a modern twist to classic styles, these techniques will elevate your portfolio and help you deliver stunning looks that will leave a lasting impression on your clients. Ready to transform your bridal hair game?
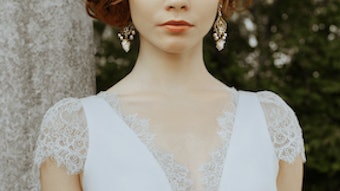
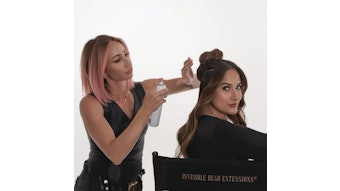
Smooth Low Bun with Accent Braid
By: Lynn Levesque (@limitlesshairbylynn)
Time: 1hr 15min
Cost: $225
As 2025 begins, I’m excited to see a rise in requests for sleek, polished hairstyles. This inspired me to create a look that perfectly captures that smooth aesthetic. While I love a stunning hair accessory, this time I’m focusing on how you can elevate your style with beautiful braids. The way this braid enhances the shape of the bun is simply lovely—it seamlessly melts into the hair, adding a touch of detail that complements the overall look without overpowering the elegance. Ultimately, the smooth low bun represents style, practicality and personal expression, making it a favorite choice for brides everywhere. Let’s embrace this trend and transform classic elegance into something truly memorable!
 Lynn Levesque's Smooth Low Bun with Accent BraidCourtesy of Lynn Levesque
- To prep the hair, begin by applying heat protectant to protect the hair from heat damage.
- Then, use Lala's Prepping Iron. Start at the root area and avoid the last two inches of the hair. This helps create more density for a smooth base without damaging the ends.
- Then, start to section the hair. Decide whether your client wants a side part or a center part – this will affect the look of the bun.
- Section both sides of your client’s hair from the top of your crown to behind the ear, using a zigzag pattern. Use clips to keep the sections out of the way as you work on creating the bun. If your client wants some hair down in the front, now is the time to leave that hair out and clip the rest away.
- Starting from the nape of the neck and working up to the crown, take small sections of hair and lightly tease the roots using a fine-toothed comb. Focus on creating volume without damaging the hair.
- After teasing each section, gently smooth the surface of the hair back down to eliminate any frizz and maintain a sleek look. Repeat this process until you reach the crown.
- Move to the sides of the hair and repeat the teasing and smoothing technique, ensuring a cohesive look.
- Use Aiir Smoothing Cream generously on the back section of the hair. This will help tame flyaways and prepare the hair for a polished ponytail.
- Using a Mustafa styling comb, carefully comb the hair back into a ponytail. Secure it tightly with a bungee to keep everything in place.
- Lightly smooth the sides of the hair and secure them into the ponytail, ensuring everything is sleek and tidy.
- To create the bun, divide the ponytail into three sections: two larger sections (ensure they have matching density) and one smaller section for braiding.
- Apply Aiir Smoothing Cream and Jade Oil to one of the larger sections. Smooth and twist this section, then pin it in place to your desired shape. Check for balance as you go. Do the same with the second larger section, twisting and pinning it until you achieve a harmonious look.
- Use the small section of hair to create a three-strand braid. Secure the end of the braid with Aiir Styling Paste and Flexible Hold Hairspray. Position the braid around the bun to your client’s liking, and pin it securely.
- Use flexible hold hairspray to give the effect of the braid melting into the style. For a polished finish, freeze the look using a blow dryer on low heat.
- Style the front fringe with a smoothing product, avoiding anything too textured for a sleek appearance.
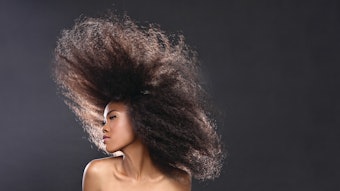
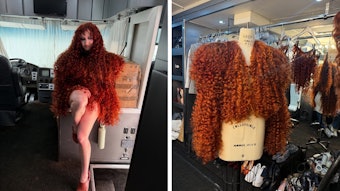
Voluminous Ponytail
By: Alexandra Wilson (@alexandralee1016)
Time: 1hr 30min
Cost: $425
I’m confident this voluminous ponytail will remain a top trend for the 2025 wedding season. It’s fun, flirty and offers a fresh twist on the classic half-up style.
 Alexandra Wilson's Voluminous PonytailCourtesy of Alexandra Wilson
- Curl hair with a tapered wand, utilizing Kenra Professional Platinum Hot Spray 20 on each section.
- Tease crown area with Pink Pewter's “Never Let Go Comb” and DESIGNME PUFF.ME volumizing power. Secure with FROMM bobby pins.
- On both sides of the head, swoop the hair back to meet pins in the crown area, and pin.
- Take all the hair you have secured in the half-up style and twist up. Use a hair bungee to secure the base of it to the crown area. You can use two bobby pins and clear elastic to create a bungee.
- Allow hair to cascade down, creating a voluminous pony. For added volume and longevity, tease under base of pony with DESIGNME PUFF.ME volumizing powder.
- Use Redken Spray Wax for adding hold and shine and defining some of the texture throughout.
- Finish with a light mist of Kenra Professional Volume Spray 25.
Sleek, Twisted Bun
By: Agnes Velner (@agnes_does_hair)
Time: 1hr
Cost: $350
This perfectly describes the 2025 bridal trend of sleek buns, showcasing simplicity while exuding elegance and sophistication. My style was inspired by the Golden Globes, where many versions of these timeless hairstyles with a modern twist were on full display.
 Agnes Velner's Sleek, Twisted BunCourtesy of Agnes Velner
- Apply heat protectant evenly throughout to clean, blow-dried hair. Be sure to brush it through to ensure there are no knots.
- Section the hair into manageable parts, then use a flat iron to smooth each section from roots to ends, eliminating all frizz.
- Divide the hair into specific sections to create the sleek ponytail: the foundation of this style. Use a fine-tooth comb alongside a boar bristle brush to ensure there are no bumps. This step takes practice to perfect! To achieve a sleek finish, use OSiS Team Wild Styling Cream and Moroccanoil Luminous Medium Hold Hairspray. Don’t be shy with the products—they help you gain control over the hair. Gather the hair, and secure it with an elastic cord to form the ponytail.
- Divide the ponytail into two sections, and twist them in opposite directions, using göt2b Glued Gel diluted with water. Begin mapping out the bun using French pins/U-pins. Once you and your client are satisfied with the look, step back to ensure the style is balanced, then secure it with additional pins. Switch to a strong-hold hairspray to lock the style in place and tame flyaways.
- Finish with Moroccanoil Glimmer Shine Spray, followed by a bit more hairspray for added hold and shine.
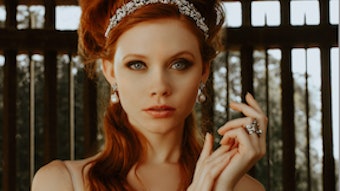
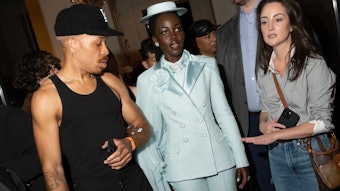
Modern French Twist
By: Annette Waligora (@annette_updo_artist)
Time: 1hr 15min
Cost: $250
Drawing inspiration from the elegance of timeless classicism and the beauty of modern simplicity, this modern French twist updo embodies a perfect blend of sophistication and effortless charm, making it a trend that resonates with the contemporary bride. As we move into 2025, I believe many brides will seek styles that reflect their individuality while maintaining a sense of grace and refinement, and this updo captures that essence beautifully.
 Annette's Modern French TwistPhotography by @kashyasiwaphotography, Makeup by @makeup_byashleyd
- Part the hair down the middle
- Section the hair from the "frontal area" down to just before the ear on both sides.
- Curl the frontal bang section.
- Create a ponytail, leaving the frontal side sections out.
- Use the HOLD.ME styling stick from DESIGNME Hair to smooth out and tame any frizz around the ponytail.
- Start twisting the ponytail slowly to the left, moving your hand up as you twist.
- Secure the perimeter of the French twist with several bobby pins. Mist the style with hairspray to tame any flyaways.
- Start curling the top sections of the hair with a Bioionic 1.5in Long Barrel Curling Iron. Using this iron will allow each section to be smooth and create volume, along with a soft curl that will make detailing this style effortless.
- Once each section is curled, secure with a clip, so that the curl has a few more minutes to settle and create its form. Then, spray the hair with hairspray.
- Take each clip out of the curled section, and start detailing, forming each section into place and bobby pinning.
- Once complete, mist the hair one last time with hairspray.
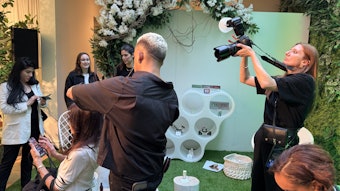
Chic Bridal Bun with Floral Accessories
By: Caidy Brasure (@caidybrasurehair)
Time: 1 hour
Cost: $400; $450-$500 with clip in hair extensions
This timeless bridal hair design is both elegant and here to stay for the 2025 wedding season. It strikes the perfect balance of detail, volume, sleekness and texture, all while delivering a soft, subtle finish. Easily customizable with clip-in extensions, it can also be paired with various bridal accessories and holds a veil effortlessly. Traditional updos can be elevated with a modern, technical approach, while preserving the simplicity and charm of the classic bridal bun.
 Caidy's Chic Bridal Bun with Floral AccessoriesCourtesy of Hair - Caidy Brasure - @caidybrasurehair Makeup - Liv Morales @livmoralesbeauty Model - Hanna Wrong @hannawrong Photography - Katie Novak @katienov Wardrobe - The Bridal Studio LLC @thebridalstudiocorktown
- Create zig-zag partings throughout the hair to prevent visible lines of demarcation. Section the hair at the crown, nape and on each side of the head.
- Use a flexible-hold hairspray to smooth each section. Create a ponytail at the nape, where the hair design will be anchored.
- Apply a soft gel or moldable paste to the nape hairline, using an edging brush to tame any shorter, stray hairs.
- Divide the crown section into three smaller sections, following the same zig-zag pattern to keep the parting lines seamless.
- Protect each section with a thermal protectant, combing through for even distribution. Lightly press with a texturizing iron for volume, then apply texturizing powder and backcomb for added fullness and height. When backcombing, push the hair forward to create a more rounded shape.
- Gently comb the section while using flexible-hold hairspray to set the hair in place. Twist the section once, securing it with a clip at the base of the ponytail. Repeat with the outer and front sections, twisting each one back to the ponytail base and leaving some hair out in the front for extra detail.
- Pinch and pull the crown and side sections to form dimensional ridges. Secure the twisted sections with a hair bungee, then combine with the ponytail and add mesh padding on top for added volume and security.
- Once again, use flexible-hold hairspray to separate the ponytail into two sections. Twist the sections over the mesh padding, securing them with jumbo hairpins. Replace with bobby pins for durability and detail.
- Pinch and pull the twisted bun area to create additional dimensional ridges. Curl the front strands away from the face, starting at eye level, and backcomb with texturizing powder for more volume.
- Use your thumb and index finger to slightly separate the hair, then spray with wax for added texture and definition.
- Lightly mist with firm-hold hairspray, followed by a shine spray to finish the look.
- Complete the style with your choice of bridal hair accessories.