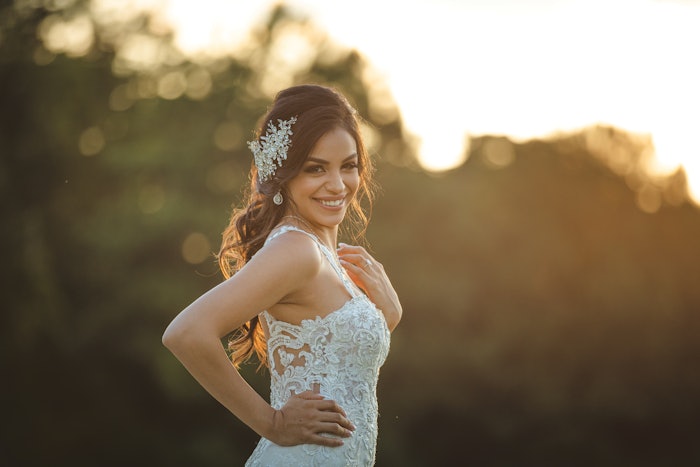
As the weather gets warmer in most areas of the country, you know that that means?! Time to get glam and go out to all those special events. Whether your clients have their own special occasion, a celebration for a family member/friend or just a night on the town, we went to four of our favorite bridal hair artists to see what is in season for glamour this spring.
Midi Bun
Sara Lopez (@svglamour)
 Midi Bun by Sara Lopez (@svglamour)Courtesy of Sara Lopez (@svglamour)
Step 2. After curling always make sure you are adding a texture spray or wax spray for added grip. I love using Aquage “Wax Spray."
Step 3. Always section out your face framing pieces, as we will use those later. My rule of thumb is top of the head to ear down, and that is how much hair you want left out.
Step 4. Start to form your texture at the crown area. Take 1-inch pieces and slightly twist. Then, use your fingers to pinch and pull to add volume and texture, and then pin. Slowly work around the head of your crown area, and continue this step until the crown area is pinned and texturized.
Step 5. Take the rest of the hair, and create a mid-height ponytail. I love using a hair bungee for this, as it creates volume and long-lasting hold.
Step 6. Make sure you have enough texture in that ponytail. If you need to add more spray wax, definitely do so! Start to take 1-1.5 inch sections of that ponytail, gently twist and form your bun! There is a lot of pinching and pulling for this bun to be as voluminous as possible. Do this step until you don’t have any hair left. It’s ok if you leave some ends out, as that creates wispies in the back.
Step 7. Remember how we left a lot of face framing pieces out? Well now it’s time to add a simple fishtail braid for the side! After you have braided, take some Sexy Hair Powder Play Lite and work that in the braid to expand it and add texture. Pin that braid directly in the back of the bun.
Step 8. We still have some wispies left out the front, so organically take some of those and pin and form on the side of the head and back to add wispies and have a whimsical feel.
Step 9. Recurl the pieces in the front that you are going to leave out, and spray some hairspray underneath those sections to really lift the face framing and give you volume!
Textured Voluminous Ponytail
Laura Chihaia (@lalasupdos)
 Textured Voluminous Ponytail by Lala ChihalaCourtesy of Lala Chihala (@lalasupdos)
Step 1. Start by preparing the hair with Lala’s Texturizing Tool (crimper) for extra volume and lift.
Step 2. Comb all the hair into a high ponytail.
Step 3. Cover the hair elastic with a piece of hair from the ponytail or a hair accessory.
Step 4. Divide the ponytail into two equal sections.
Step 5. Grab the right section, divide that into two equal sections and twist them around each other from the right to left, pulling out each twist for more volume and texture. Secure with a small rubber band to secure the twisted section.
Step 6. Repeat the same steps on the left section, but change the twisting direction from the left to the right. Secure the twisted section with a small rubber band.
Step 7. Grab both twisted sections and secure them together with another small rubber band.
Step 8. Set and clean the ponytail with a medium hold hairspray.
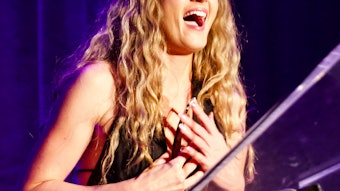
Glam Waves
Caidy Brasure (@caidycreate)
 Glam Waves by Caidy BraisureCourtesy of Caidy Braisure (@caidycreate)
Step 1. Section a one-inch row starting at the nape, and apply thermal protectant spray as well as flexible hold hair spray to the row. Brush through for even distribution.
Step 2. Utilizing a one-inch curling iron, take a one-inch section of hair and flat wrap it around the curling iron, starting at the base and working your way to the ends until the entire section of hair is wrapped around the curling iron. Hold for a few seconds until the section feels warm. While not allowing the curl to drop, remove the curling iron and clip into place with a creaseless clip.
Step 3. Continue this process up to the crown of the head, ensuring all hair is being curled and clipped in the same direction.
Step 4. Once you reach the crown, continue to take one-inch sections and apply a texturizing powder at the roots to back comb. Continue with application of a thermal protectant and flexible hold hairspray, brushing through for even distribution, utilizing the same curling and pinning technique. However, begin the curl one to two inches away from the scalp to maintain volume.
Step 5. Repeat throughout all of the crown section. Be sure to ask your client how much volume they would like in the crown, as well as in the front section of the hair, smoothing and perfecting those sections prior to curling for maximum results.
Step 6. Once the hair is cooled completely, start at the bottom nape down and begin releasing curls from their clips. After each row is let down, apply a flexible hold hairspray to a wide tooth comb and brush through the curls. Lifting the section up to lightly backcomb underneath will help create hold as well.
Step 7. Additionally, you can spray the flexible hold hairspray onto the hair and utilize the can of the hairspray to then press into the curl indentation to further set. Repeat this step to all curls.
Step 8. Once all brushes and back combed to your liking, utilize a firmer hold hairspray to lock everything into place, then finish with a shine spray.
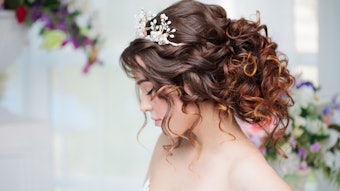
Braided Updo
Annie Rainwater (@annie.x.artistry)
 Braided updo by Annie RainwaterCourtesy of Annie Rainwater (@annie.x.artistry)
Step 1. Begin by sectioning the hair from the center of the back of the head, and create long vertical twists, alternating directions with each twist while leaving out strands for added detail and wispy accents.
Step 2. On one side, style a fluffed out Dutch fishtail braid, securing it over the twisted back section.
Step 3. On the opposite side, add two Dutch braids to be secured over the back section, adding depth to the overall style.
Step 4. Leave some hair on the sides for intricate detailing, then gather all the remaining hair at the back into a low ponytail.
Step 5. Transform the ponytail into a bun using a series of twists, ensuring to fluff it out for that effortlessly boho aesthetic.
Step 6. Utilize any leftover hair to seamlessly integrate into the style, weaving it through the sides and into the bun for a cohesive look.
Step 7. Finish off by delicately curling the face-framing strands, embellishing with accessories, and voila – your stunning hairstyle is complete!

