Most guests probably liked their layers in the pixie and will want to keep them for mid to longer looks (the upside of giving someone a pixie, layers for life!). Why? Because layers add texture, character and movement, who wants to say good-bye to that? You just need to hold their hands until the layers get long enough for you to work into another shape. Most will want a choppy bob, it’s a hot look right now, so utilize undercutting and under layers, tip them upside down to blend transitional layers and texture and make a style look new.
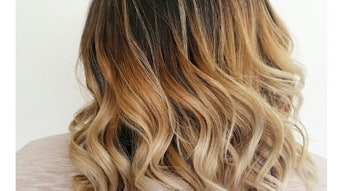
As with all cuts, a choppy bob should be a planned shape, taking facial structures and profiles into consideration, and it can be exciting to take your guest through several looks along the way. Most choppy bobs have a strong clean perimeter that can be styled sleek and polished or very organic with alluring texture. Most will opt for the sexy texture, here’s how to style a choppy bob with beautiful casual texture that highlights layers and movement.
· Shake Redken Pillow Proof Primer and spray evenly throughout damp hair and distribute with the wide end of the Sam Villa Wide Cutting Comb.
· Spray about a golf ball size amount of Redken guts 10 into your palms and distribute with fingertips, approximately one inch away from the scalp to mid shaft.
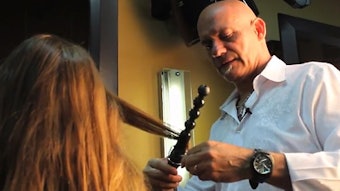
· Turn on your curling iron and set aside.
· Using the Sam Villa Professional Ionic Blow Dryer with nozzle and Sam Villa Styling Brush, dry the hair completely, smoothing hair from scalp to ends. (No need for a directional blow dry as you will be using the curling iron to finish the look.)
· Once dry, section the hair.
o Occipital to nape
o Sides
o Crown
o Front
· The size of the section will determine how loose or strong the curl will be – the larger the section the looser the curl/wave.
· Spray Redken iron shape 10 at least six inches away from your parting and comb through with the fine end teeth of the Sam Villa Wide Cutting Comb.
· Begin in the nape with your curling iron and spiral wrap each parting leaving two inches of hair out of the iron at the ends throughout the entire head.
· Once the entire head is curled, use fingers to rake through the hair for a disheveled, natural looking texture.
Don’t let the end of the pixie affect your business growth, sail through with a plan for a choppy bob!
Aspire for MORE!
[Image: Dr. Billy Ingram/Getty Images]