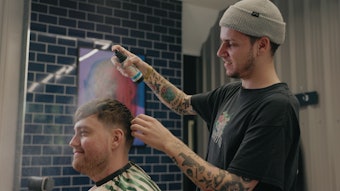
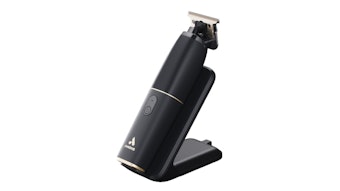
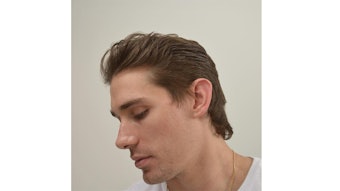
Andis is releasing its first styling series, the American Legacy collection, featuring looks that can be achieved with the company’s clippers and trimmers and highlighting six hair makeovers of people who work at the company. Andis educators Kenny Duncan and Jason Potchen, created the Classic Taper on Anel from machine shop, a Crop and Pixie on Shirley and Jenny both from assembly, a Classic Side Part on John from shipping, the Fauxhawk on social media expert Travis (below) and the South of France on Riko from machine shop.
 ping to build their legacy is at the heart of our mission.”
The video tutorials walk the professional through the steps of each cut in great detail and can be accessed through the Andis website. “Many stylists did not receive adequate training using clippers so they don’t realize how effective they can be in creating the latest styles, especially those that require tight fades and tapers. That’s where the tutorial is so effective,” says Duncan. “We want to give stylists the education they need to master the cuts using the tools that are most effective at delivering it”
Andis will release its second collection of six hairstyles this summer. To view the American Legacy Collection and the tutorial videos visit www.andis.com/GetTheLook.
Or, read on to check out the photos and how-tos!
[pagebreak]
Look: Classic Taper with Accentuated Side Part
Model: Anel
Tools: Master Clipper and T-Outliner
Before:
 rth rotation with a closed clipper, clipper over horizontal comb. Keep comb spine on the scalp and angle out 45 degrees.
4. Fifth revolution, open clipper and position comb diagonally to clipper over comb to blend. Use corner of clipper blade to notch and blend the fade.
5. Close the clipper and C stroke the nape to guideline.
6. Use the T-Outliner to shape and edge nape. Start at the chin and work up the side to the ear establishing chinstrap outline.
7. To trim length of beard, use Master with #1 Nano Silver Guard and go with the grain.
8. Create texture on top of the hair by point cutting.
9. Use T-Outliner to carve in accentuated side part. Connect to cowlick in back.
After:
 .5in;">3. Clipper over comb in horizontal panels to the occipital. To fine tune the taper, adjust Envy to open position and clipper over comb in diagonal panels.
4. Create texture at the occipital by adjusting the Envy to closed and point cutting in diagonal sections to blend into the top.
5. Moving to the smaller side section, Keep clipper closed, use hair from the occipital as your length guide and cut clipper over comb.
6. Point cut in diagonal panels to texturize and blend into the top.
7. Last section, start at the part line and blunt cut across using the first section as length guide.
8. Over direct to create texture working away from the part.
9. Style hair as desired with curling iron. Fine tune the nape and edges with T-Outliner and trim wayward strands.
After:
ital and to each side section creating a taper.
3. At the side section beginning at behind the ear, use the back section as your length guide. Angle comb toward the face to preserve length in front and clipper over comb. Repeat other side.
4. Detail side edges and nape with the trimmer.
5. Move to top section, work front to back in ¾” subsections. Clipper in the closed position, use the free hand technique, cutting length to 5” for later texturizing.
6. To blend top into the sides, work from back to front and continue the free hand technique in vertical subsections pulled out horizontally to cut.
7. Create texture on top with point cutting. Style as desired.
After:
e natural part. Adjust clipper to #0000, use the free hand technique on top and over direct from the far side working toward the part to ensure even cutting.
3. Trim bangs at #1, chip in clipper over comb to blend top to sides and cowlick in back; use a C stroke to taper the nape. Move to #000 to shape and clean neckline. Use clipper over comb to fine tune taper.
4. Use SlimLine Pro to edge. Around the ears, use a clock technique; cut from 9 position to 12 and 3 position to 12 to ensure an even cut.
5. For beard, use SlimLine Pro to shape goatee. To create crisp line under the chin, use jawbone as guide, start in the center and move side to side.
6. To trim goatee length, clipper over comb with the Supra 120 ion at #1. Edge lip line with the SlimLine Pro
After:
Switch to #2 blade to blend the line of demarcation. Notch with the corners of the blade for a seamless blend. Remove hair at the nape.
3. Moving to the top of the head, use the #000 blade and the free hand technique front to back in .5” subsections. Keep hair in front longer.
4. Switch to the #1 blade and clipper over comb to blend top to sides.
5. At the nape, start with the 1A blade and C stroke to taper. Switch to #1 blade and repeat C stroke, then transition to #000 blade. Notch with corners of blade to blend hair.
6. To remove beard length and bulk start at the side burns with a #1½ blade. For the mustache, which usually grows faster and is more dense, use a 1A blade.
7. Use the SuperLiner Trimmer to edge around temple, ears and nape.
8. For the chinstrap, use the jawbone under the chin as a guide, start at the center and move side to side to create a straight line. Shape mustache.
9. For full service groom, clipper over comb eyebrows. Check ears and nostrils, use the corner of the T-blade to detail and trim. Disinfect trimmer in between trimming areas.
After:
 art the star burst fade, with #000 blade remove a 1” section of hair in the shape of a half circle around the ear with a C stroking motion.
2. Continue with OA blade and C stroke to enlarge the initial half circle in half inch sections.
3. Position flattop comb horizontally to blend the shortest hair to the longest hair while maintaining the same half circle shape previously created.
4. Use the 1½ blade set with the growth stream to reduce the length of hair in the crown, sides, and back of head.
5. Apply mousse and use a boar bristle brush and a hair dryer to mold hair into a defined wave pattern. Let it set.
6. Switch to the Slimline Pro trimmer to outline facial hair to form the sideburns into a point while the facial hair on the cheeks are outlined.
7. Outline the front line, sides, and nape of the hairline with the SlimLine Pro to enhance its natural shape
8. Use the ends of T-blade to create parts.
9. Use #OOOOO blade set to freehand trim facial hair and skim the surface and remove wayward hair from the crown, sides, occipital and nape.
After:


