You, the lash artist, are exactly what your title says: an artist. Every time you create a lash design for your clients, you’re customizing a style based on more than what the latest celebrity is sporting; you’re taking into account several factors: eye shape, age, profession, lifestyle and more. There’s no doubt: Mapping lash designs “isn’t one-size-fits-all,” stresses Scott Hoonakker, chief financial officer of PremierLash. He draws this comparison: “Not to oversimplify, but imagine a hairstylist giving only pixie cuts to her entire customer base or, similarly, a nail artist only offering a square- shape nail.” You wouldn’t seek the services of a beauty professional with a single-minded approach to their craft, and neither would your clients. Simply put: The more diverse and customized you can be with your artistry, the more your services will be in demand.

RELATED: Survey Shows Brow and Lash Artist are Satisfied with Their Work
One way to ensure your lash styles are works of art: Understand lash extension curls and how each functions. See the chart below to learn how the letters that matter most to lash extentionists—J, B, C, D, L, L+ and U—can elevate your artistry.
They may be a group of letters, but when it comes to lash extensions, recognizing how J, B, C, D, L, L+ and U work will allow you endless creative opportunities with your lash artistry. But before you drill down on what each curl does, follow these tips from Scott Hoonakker.
RELATED: Industry Experts on the Future of Lash Extensions
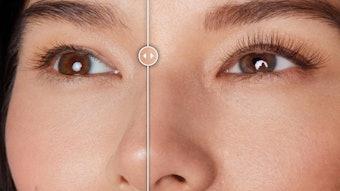
- Analyze Eye Shape. First things first: Figure out the eye shape and then map accordingly. “This takes into account where the longest lashes are applied to create lift and the illusion that the eye is bigger and more open,” says Hoonakker.
- Factor in Fullness and Color. Find out how much volume your client desires (and what her natural lashes can hold), and include this in your map. If you want to include color or highlights, you’ll want to determine placement for this as well.
- Use Length Properly. “A common mistake stylists make is placing the longest lashes at the outer edge of the eye,” says Hoonakker. If your client has downward- sloping or almond-shape eyes, this type of mapping “causes the eye to appear tired or sleepy.”
- Map For the Future. Once you’ve mapped the desired style, Hoonakker suggests saving your notes so that you can emulate the same lash design for the client’s next appointment—unless she wants to change it up, that is!
Isolation Tip!
Having issues with “stickies”? It could be that your adhesive hasn’t fully dried to allow a firm bond. Before releasing your tweezer grip, hold the extension in place for a few seconds to ensure it adheres before moving on to the next extension.