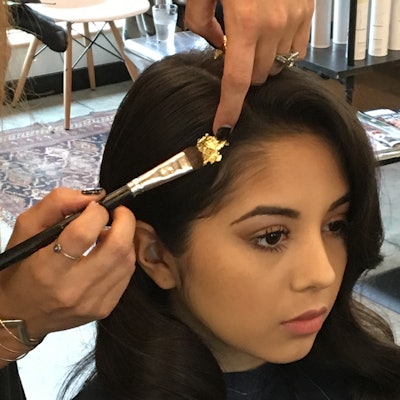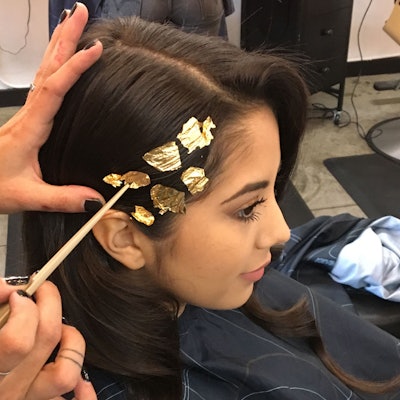
First there was glitter roots, then sparkly undercuts, and now, thanks to KEVIN.MURPHY stylist Sarah Lund, there’s a new look for lovers of all things shiny: hair foiling. Not the typical “foiling” that comes to a hairstylist’s mind, the look takes the hair accessories trend and kicks it up a notch with carefully placed flecks of silver and gold foil.
Applied to a finished ‘do, hair foiling adds just the right amount of sparkle for a festive Christmas or New Year’s look. And the best part? It’s totally customizable, meaning your client can be super subtle or go big and bold.
Add a touch of golden glam to an everyday look, or a little silver sheen to an attention-grabbing updo, or even mix metals to highlight a gorgeous new hair color. The look is simple to recreate with Sarah’s tips, below!
Hair Foiling How-To:
- “First, prep damp hair with a setting lotion and rough-dry into your strands. You’ll want to look for a product that will give volume and longevity, like ANTI.GRAVITY.SPRAY,” says Sarah.
- “Next, set hair on a large curling iron, holding horizontally, so hair falls into waves instead of curls. Once cooled, smooth over with a brush and a working hairspray like SESSION.SPRAY to add hold and shine.
- “Now it’s time to determine where you would like to add your foiling. It looks amazing along the part line or in the hair tucked behind the ear around the hairline. Remember, this is a statement, so a little goes a long way!

- “You want to concentrate SESSION.SPRAY wherever you want the foil to stick. You will be fanning it out later, so make sure to cover a smaller area than what you want your finished result to cover. Allow the spray to become tacky and gently place the foil flecks randomly on the section, patting in with a small makeup brush. Spray over everything and allow to completely dry.

- “Lastly, use an eyeshadow brush to lightly tap and drag the foil to break apart the pieces. Allow small bits to fall into the hair for added glamour, and voila!”
