By Matt Buccioni and Nicole Kenny
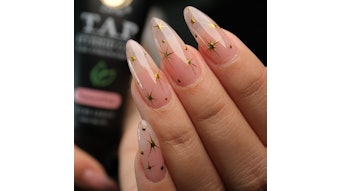
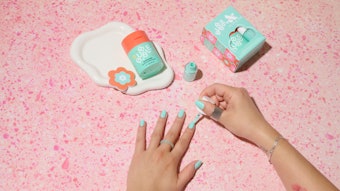
As nail professionals, you know that there’s more to your work than what meets the eye.
While anyone can attempt to paint their nails at home, only professionals can provide the wide range of services that bring people to a nail salon. The same goes for preventing infections—while many people use disinfectants in their homes, chances are they are not using them correctly and certainly not cleaning and disinfecting to the level of a professional setting. Pathogens such as bacteria, viruses and fungi can use the surfaces and tools throughout your salon to spread from one victim to the next. The COVID-19 pandemic has been a testament to the importance of putting prevention front and center. Investing in a professional cleaning and disinfection protocol is one of the best investments you can make in safeguarding the health of your business.
Know Your Enemies
COVID-19 may have dominated the headlines over the past year, but it’s far from the only pathogen your facility may encounter. Other viruses such as seasonal influenza and Norovirus, as well as HPV (human papillomavirus which causes plantar warts), are commonly found in professional beauty settings. Aside from viruses, bacteria such as staphylococcus and mycobacteria are often to blame for skin infections, along with trichophyton, a fungus that can infect skin and nails.
Pathogens are spread from one person to the next in a few different ways. Some pathogens can travel through the air in droplets when we cough or sneeze, which can land on other people directly or on a surface. Others can stay suspended in the air for longer and may be inhaled. Once they land on a surface, many pathogens can be picked up by the next person who touches it—this is known as fomite transmission—and can lead to your facility making headlines due to an outbreak associated with improperly cleaned and disinfected surfaces and tools.
Strength in Numbers
Even the best cleaning and disinfection protocol won’t work if your whole team isn’t on board and accountable. This means making sure that everyone understands their role in ensuring that important surfaces get cleaned and disinfected properly.
Make a list of the surfaces throughout your facility that need to be cleaned and disinfected and determine whether each surface is high-risk or low-risk for infection – this will help you decide how often they will need to be disinfected. As a rule, higher-touch surfaces such as tools, chairs, and point-of-sale equipment would be considered high-risk and would be disinfected more frequently, perhaps after each client appointment. On the other hand, surfaces such as floors carry a much lower risk of infection and may only need to be disinfected daily. Using cleaning logs is a great way to keep track of your protocol and ensure that nothing gets missed. Posting them in plain sight is a reminder that they need to be followed, but also a visual tool to show your clients how important you take their health.
A Balancing Act
Choosing a disinfectant is a balancing act between efficacy and safety. The product you choose for surfaces around the facility should be an EPA-registered hospital disinfectant, with label claims against a large spectrum of pathogens, including harder-to-kill viruses such as poliovirus, norovirus, rhinovirus or rotavirus. This can give you confidence that it will have you covered in the face of whatever viral pathogen may come through your door. The disinfectant should also be formulated with detergents, which will allow it to work as a one-step cleaner-disinfectant and eliminate the need to pre-clean surfaces with a separate product. It should also work in a rapid and realistic period of time so that it does not evaporate before getting the chance to properly kill pathogens on the surface.
The length of time that a disinfectant needs to remain wet on the surface to work properly is known as the product’s contact time, which can be found on the label.
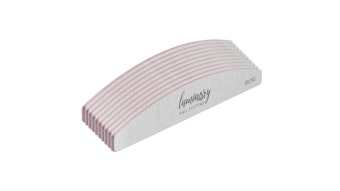
For tools such as nail files, clippers, nippers and cuticle pushers, which may accidentally break the skin during use, soaking the instruments in a high-level disinfectant solution is recommended to provide an added layer of protection. While this may not be required by all state guidelines, it is the standard in healthcare settings, and a great way to show your clients that you take infection prevention seriously by elevating your protocols to the next level. These products have also been approved to be used for multiple days without disposing which reduces the amount of disinfectant you are disposing into the environment.
No matter how effective, the disinfectant you choose should never compromise on safety to you or your clients. Look for a disinfectant that is non-toxic and non-irritating to eyes and skin when used as directed, and that will not cause damage to your tools and other surfaces. Also, choosing the right disinfectant can help protect the planet—look for a biodegradable product, that does not leave harmful residues behind in the environment.
Working Hand in Hand
Choosing the right disinfectant is only half the battle—effective cleaning and disinfection mean pairing your product with the right process. This means reading your disinfectant label and ensuring that your team is trained on how to use it properly. For instance, is the product a one-step product, or do the surfaces need to be pre-cleaned? Is it a concentrate that requires dilution, or does it come as a ready-to-use spray or wipes? Is any personal protective equipment (PPE) required to use the product safely?
To disinfect surfaces throughout your facility, prepare your disinfectant solution and follow these basic steps:

To disinfect your tools in a high-level disinfectant solution:
- Pre-clean the tools using a detergent and warm water. Then, rinse and dry the tools before disinfection.
- Pour the high-level disinfectant into the soaking tray. Immerse your tools in the disinfectant solution.
- Leave the tools in the solution for the required contact time. Then remove your tools, and rinse and dry them before placing them into a clean container.

A good cleaning and disinfection protocol should have a few basic quality control measures to ensure that important steps don’t get missed. This means keeping a log of all surfaces and recording when they are disinfected. Another aspect of this is making sure that all solutions you use for cleaning and disinfection are properly labeled and discarded once their expiry date has passed.
Not a Guessing Game
Nail professionals are experts in providing top-quality services to their clients and creating a safe experience for them during the appointment and beyond. Infection prevention is an important part of this, but too often it can feel like a guessing game. Implementing a strong cleaning and disinfection protocol can help instill a sense of confidence that you’re creating a healthy environment for each client that walks in the door.
About the authors:
Matt serves as the infection prevention and biosecurity specialist at Virox Technologies Inc. In this role, Matt is involved with providing education and technical support to a wide range of industries on preventing infections through cleaning and disinfection. He has written articles, blog posts and training materials to help facilities develop and build upon their infection prevention protocols. Drawing on his interests in science and infectious disease, he enjoys speaking, writing, and educating about new technologies to prevent the spread of infection.
Nicole Kenny is the vice president of professional and technical services at Virox Technologies with over 20 years of experience as an infection prevention trainer, presenter and author working in the field of environmental hygiene and disinfection. Virox Technologies is the creator of Rejuvenate™ Disinfectants specifically formulated for the professional beauty industry. To learn more, visit RejuvenateDisinfecants.com.