Vinyl Nail Decal Tips & Tricks:
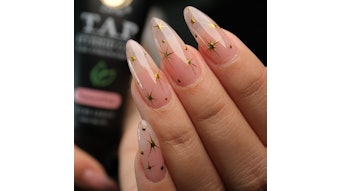
Steps for Nails Vinyl Decals (Leave On Sticker)
1. Apply nail polish and allow nails to dry. Wait longer then you think to assure no smudging occurs when decal is applied.
2. Peel away vinyl decal from paper. Use a tweezers to help with small pieces.
3. Place decal onto your nail in desired location.
4. Press decal firmly.
5. Apply a clear top-coat to seal in the design.
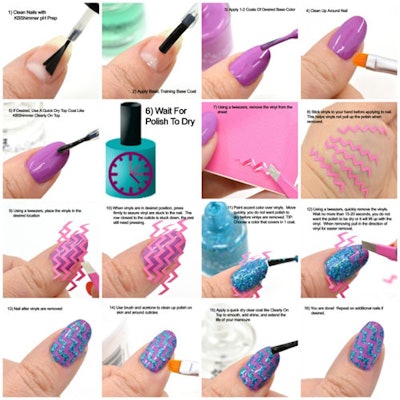
Steps for Nails Vinyl Stencils (Removed Pieces)
1. Apply nail polish and allow nails to dry. Wait longer then you think to assure no smudging occurs when vinyl decal is applied and removed. If desired, apply quick dry top coat to quicken dry time.
2. Peel away vinyl stencil from paper backing. Some designs may require "weeding" (removal of excess components). Use a tweezers to help with small pieces.
3. Nail vinyl’s tend to be very sticky, apply to your hand first, remove, and apply to your hand one more time before placing on the nail. This allows your natural oils to reduce some of the strength of the adhesive.
4. Place stencil onto your nail in desired location and press firmly. Make sure all edges are firmly touching the nail on the nail so polish does not bleed under vinyl decal.
5. Apply a different color polish onto your nail and over the vinyl decal like a stencil.
6. While the polish is wet, remove the decal stencil. Wait no more then 15-20 seconds before removing, or the polish may pull up with the decal stencil.
7. Apply a clear top-coat to seal in the design.
If you have small pieces that do not overlap onto your skin for easy removal, use a tweezers to pull up from the edge or puncture vinyl and pull up with tip of tweezers.
Each sheet retails for $5 - $6, and contains enough for multiple manicures. For more information, or to purchase, please visit https://www.kbshimmer.com/product-category/nail-vinyl-decals/.
[Image courtesy of Y Communications]
