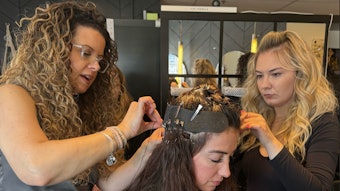
Hair: Teresa Romero, Sam Villa Artistic Director
Makeup: Tanya Ortega and Leticia Tapia
Wardrobe: Michi Lafary/Obsidian and Blush
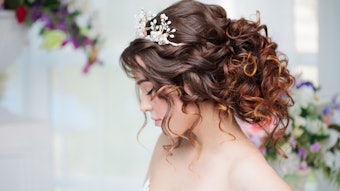
Model: Julia Railey
Tools: Sam Villa
Products: Redken
Videographer: Todd White
Makeup: Tanya Ortega and Leticia Tapia
Wardrobe: Michi Lafary/Obsidian and Blush
Model: Julia Railey
Tools: Sam Villa
Products: Redken
Videographer: Todd White
Photography: Nico Norsdström/Obsidian and Blush
Cutting hair today combines multiple styles and techniques to produce fresh, new looks.
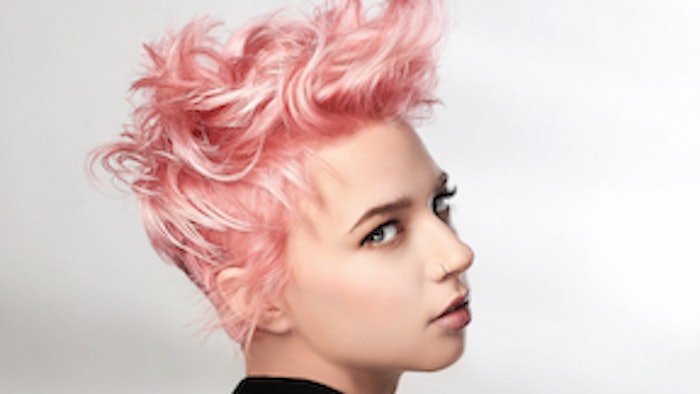
“This pixie has alternating layers, graduation and disconnection contributing to a patchwork of movement in shorter lengths with a strong shape. Hair is cut to move forward and backward all at the same time to create a versatile array of shapes and textures, providing many styling options,” says Teresa Romero, artistic director for Sam Villa and artistic/education director for Jose Luis Salon.
The Julia Textured Pixie Step by Step:
- Secure the top section from the sides and back.
- Create a square-shape section below the parietal ridge and top of the ear forward.
- Divide the side square section in half horizontally.
- Cut the top half of the section with clippers or scissors to approximately 1.5" long. The bottom half of the side section will be disconnected from the top section.
- Repeat these steps on the other side section.
- On both sides, creatively open the hair up above the ear.
- Be imaginative while cutting and use descending elevations to create asymmetry in the weight line. Start behind the right ear and elevate a horizontal section to the top of the ear. With each additional horizontal section, drop the elevation a little.
- Continue doing this until the area behind the left ear.
- Drop the top section and create six individual subsections.
- Start in the center left top section, elevate hair 90° from where it lives, cut the hair shorter in the front and longer toward the crown. Keep the completed subsection isolated and disconnected from the other subsections.
- Move to the next subsection on the top left. It will be longer in the front and shorter toward the crown.
- Isolate the completed subsection from the rest. Complete each top subsection in the same alternating disconnected approach.
PRO TIPS:
- Use cutting tools with confidence and personalize the final look.
- To stay organized, keep cutting sections clean and neat.
- For maximum movement, use styling products that enhance the natural texture of the hair.