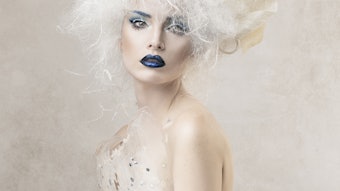

Artist: Milla Aralehto, Pivot Point, Italy
Makeup: Amy Howard
Fashion Stylists: Shanel Regier, H(OM)E, L. Edgar Duff, Lauren Lein Ltd., TIV, Haji Couture, Veronica Riley Martens, Katrin Schnabl
Photographer: David Placek

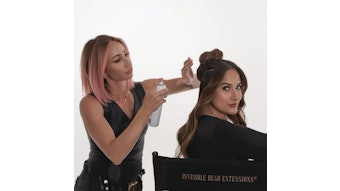
Step 1: Hair Additions
A slightly staggered pattern will be used to apply four hair additions on the left side, using a “sandwiching” technique.
The hair additions are secured with adhesive tape, which is part of the addition.

Step 2: Take the first horizontal parting using the eyebrow for reference.
Place the hair addition, tape side up, beneath the strand.
Press to secure.
Place another hair addition on top of the strand, tape side down, and press firmly to secure.
Continue with the remaining hair additions.


Step 3: Structure Graphic
The back consists of graduation with increase layers at the nape.
The left side is graduated, and the right side is solid form, sculpted along opposite diagonal lines.
Sculpt the front in a curved solid line.
*Note: Sculpt the hair dry.

Step 4: Begin at the nape and divide the section in half vertically.
Distribute the left section upward and project 90°.
Slide cut starting at the top.
Use a portion of the center of the section on the right side as a length guide.

Step 5: Release a center, vertical parting in the upper back.
Sculpt with the notching technique.
Work toward the left and converge subsequent partings back to the stationary design line.
Then work from the center to the right.

Step 6: Move to the left and release a horizontal parting. Use natural distribution and low projection.
Slide cut a diagonal-forward line. Work to the top of the section or until hair lengths no longer reach.

Step 7: Move to the right side. Release a thick, diagonal-back parting extending slightly to the back.
Use natural distribution, no projection and sculpt parallel.
Work toward the back.

Step 8: Move to the front and release a parting parallel to the hairline.
Use natural distribution and freehand sculpt a concave line around the right eye.

Step 9: Release the remaining lengths and use natural distribution.
Slide cut to further blend lengths with the left side.

Step 10: Color–Weave the first section, and position a thermal strip away from the base.
Apply lightener approximately one-third away from the base through the ends.
Apply another thermal strip over the strand.
Continue through the remaining woven sections.

Step 11: Apply level 6, red- orange demi-permanent color with developer at the crown.
Apply a level 3, medium brown demi-permanent color with developer to the remaining lengths.
Apply a red accent color to the lightened portions.
Process, rinse, shampoo and condition prior to styling.
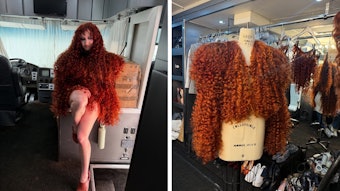
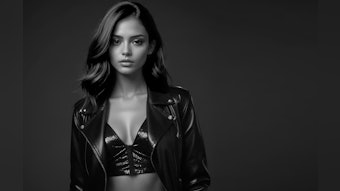
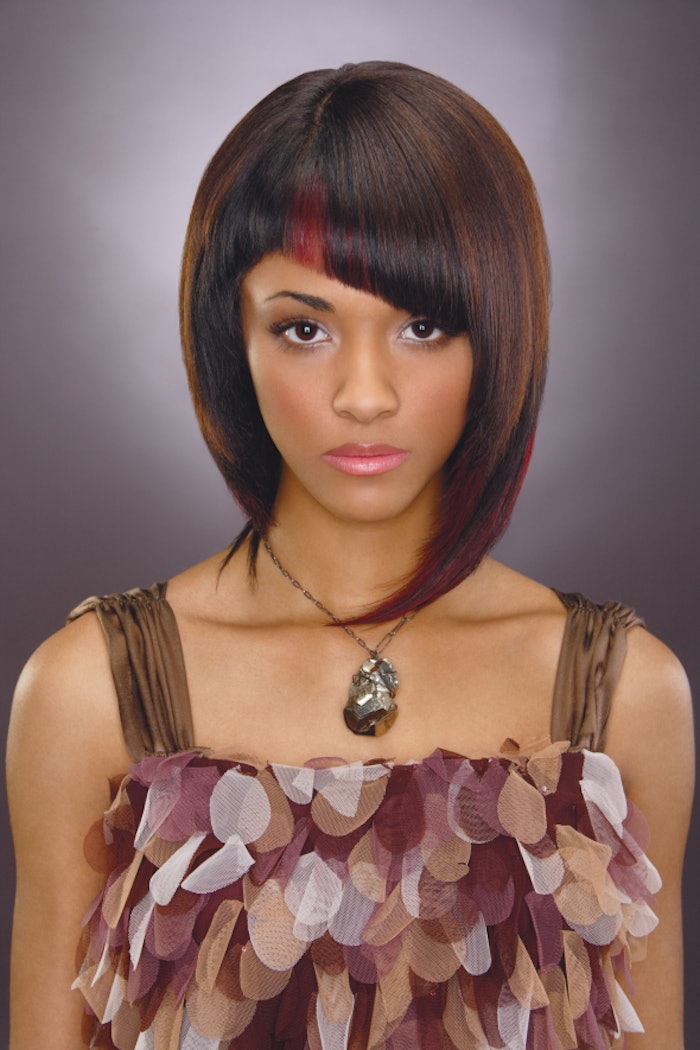
Final Photos:


Click for More Hair Styles How To's SHORT CUTS:
Click for More Hair Styles How To's MID-LENGTH/LONG CUTS: