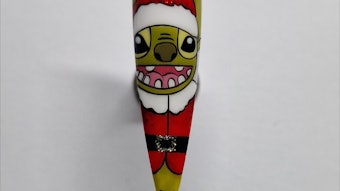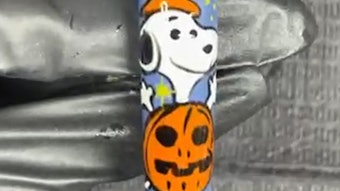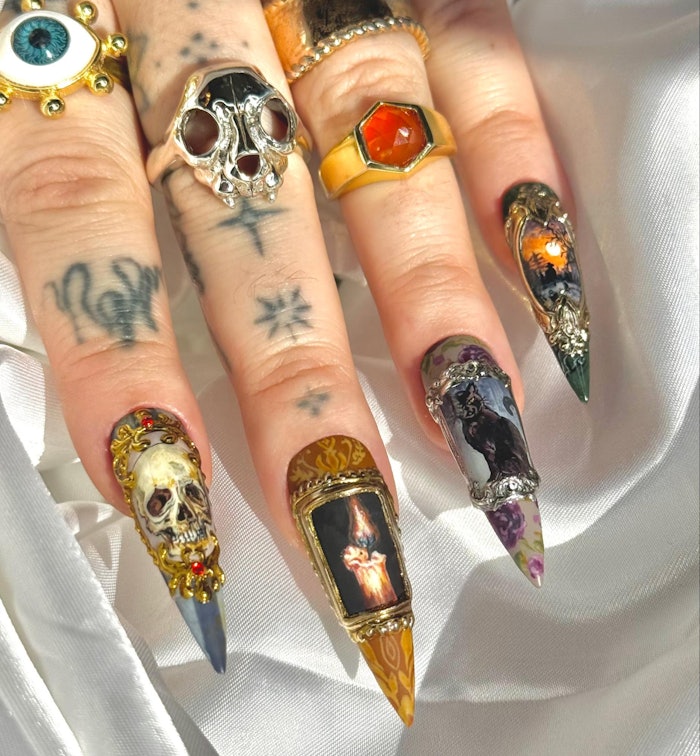
As the leaves falls and the weathers cools, spooky season makes its appearance once again! There's no better way to get into the Halloween spirit than with statement-making nail art. From playful pumpkins to skin-crawling 3D art, Halloween nails offer endless room for creativity! To celebrate the season, we reached out to Sacramento, CA-based nail artists Avery Martin (@avesnailworld) and Raquel Calixto (@dieprettynails) for their insights on Halloween nail art. Plus, they share tutorials for creating eye-catching spooky looks that your clients will die for!
Add gloss only to the eyeballs with a shiny top coat to make them pop and look extra lifelike.
This article is only available to registered users.
Log In to View the Full Article
As the leaves falls and the weathers cools, spooky season makes its appearance once again! There's no better way to get into the Halloween spirit than with statement-making nail art. From playful pumpkins to skin-crawling 3D art, Halloween nails offer endless room for creativity! To celebrate the season, we reached out to Sacramento, CA-based nail artists Avery Martin (@avesnailworld) and Raquel Calixto (@dieprettynails) for their insights on Halloween nail art. Plus, they share tutorials for creating eye-catching spooky looks that your clients will die for!
Halloween Nail Art Q&A
Beauty Launchpad (BLP): What got you first interested in Halloween nail art?
Avery Martin (AM): Halloween has always been my favorite time of year—I’m absolutely a spooky girly at heart. So when I started doing nails at 18, it was a given that Halloween art would be a huge part of my identity as a nail artist. Over the years, I’ve realized it’s not just me, Halloween is also my clients’ favorite time for fun and creative designs. Even my most simple, minimalistic clients go all in for Halloween and want something spooky. That shared love for the season and the creative freedom it brings has only deepened my passion for Halloween nail art —and it keeps growing every year.
Raquel Calixto (RC): I’ve always loved Halloween! It’s been my favorite since I was a kid. My mom used to go all out decorating and making it really special for us, so it brings a lot of nostalgia. I just love the spooky vibes and how creative you can get during this season. Halloween is the perfect time to push boundaries and have fun with nail art, whether it’s creepy characters or cool textures.
BLP: Do you have any favorite Halloween designs you look forward to creating each year?
AM: Honestly, I love doing them all. For me and my chaotic artist brain, it’s actually refreshing to cycle through different art styles and levels of complexity throughout the season, it keeps things exciting! I love being a dynamic artist who can switch it up and adapt. If I had to pick, I’d say the more intricate, hand-painted designs are my favorite — that’s definitely my specialty. It’s also always a bonus when clients let me freestyle a bit so I can channel whatever my inner artist is feeling in that moment, while keeping their personal style in mind, of course.
RC: Definitely! I love doing character art — Ghostface, Terrifier, that kind of stuff. But honestly, drawing pumpkins is my all-time favorite. There’s just something about the shapes, shading and how you can make them cute or spooky. I look forward to those every year.
BLP: What Halloween nail trends have you seen recently? What’s one Halloween nail look you think is underrated or overdue for a comeback?
AM: As always we see the classics — blood drips, splatter, ghosts, pumpkins —which are super fun. Although one theme I really love seeing around Halloween is the witchy vibe. There are so many directions you can take it, from dark and moody to celestial or cutesy and sparkly. I love the colors that come with it, from the purples to the deep greens and silvers and even how glitters and chromes can totally transform a witchy set. I think it’s such a versatile and underrated theme that has so much room for creativity.
RC: One trend I’m really into right now is the 3D ghost nails—where the whole nail is a ghost and the little arms are sculpted in 3D. It’s so cute and different.
BLP: How do you customize Halloween nail designs to suit different clients’ styles—like balancing spooky with chic or cute with creepy?
AM: This is such a great question — and honestly one of the most important skills to have as a nail artist. It’s something I’ve developed over time through a lot of trial and error, and it’s something clients often mention that they appreciate. With my regulars, I’ve learned their styles inside and out — what they love, what their hard no's are and how much creative freedom I can take while still staying true to their vibe. For newer or once-a-year Halloween clients, I rely on clear communication. I ask for inspo, if they’re open to 3D or prefer painted designs, their favorite colors, deal-breakers, whether they lean gold or silver and what kind of Halloween energy they’re going for more — specifically cutesy, bloody and gorey, glam, character-based, etc. From there, I piece everything together like a little puzzle until I’ve jigsawed the perfect custom Halloween design just for them.
RC: I always try to read my client’s vibe. Some love super spooky, horror-inspired nails, while others want more soft or girly Halloween looks. I’ll do things like pink ghosts throwing peace signs or floral accents on creepy designs to blend their aesthetic with the Halloween theme. I usually ask for inspo pics and then freestyle something unique for them based on their energy and style.
BLP: What are some staples (products and tools) you need to bring your Halloween nail art/designs to life?
AM: A super fine detail brush is a must—my go-to is from NailsByDevShop. I also love their highly pigmented liner gels for tight, intricate hand-painted designs. GAOY Matte Top Coat (available on Amazon) is my holy grail, especially for isolated chrome designs — no buffing or wiping needed. Just matte your design, apply a no-wipe gel where you want chrome and go. It’s also a beautiful soft matte on its own. Sheer black, brown and white are essential for adding shadows, highlights or giving a worn, aged look to your art—an easy way to elevate any design. Always stock up on black, blood red and slime green gels—you’ll fly through them during Halloween (especially the black)
RC: A good nail art brush is key—precision is everything when you’re doing tiny details. I also love using Red Iguana Blooming Gel, especially for blood or smoky effects. A super pigmented black gel polish is a must too.
Halloween Nail Tutorials
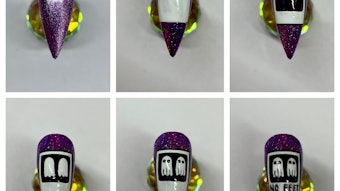
Haunted Frame Portrait Nails
This Halloween design features a vintage-style wallpaper base, a hand-painted haunted portrait and a custom chrome frame. The concept is fully customizable —switch up the portrait, wallpaper style or chrome color to match your vibe. — Avery Martin
Supplies:
- Gel polish in vintage tones (for wallpaper)
- Matte top coat (GAOY Matte recommended)
- Highly pigmented gel paints (for portrait)
- Detail brushes
- No-wipe gel (black or desired chrome base)
- Chrome pigment + applicator
- 3D no-wipe gel (for raised frame details)
- Rhinestones or pearls & rhinestone glue (optional)
- Top coat
- Apply the Wallpaper Base: Choose a vintage tone like dusty olive, faded plum or smoky mauve. Apply 1–2 coats, and cure. Add stripes, damask or aged texture using a slightly darker shade and detail brush or sponge. Cure.
- Paint the Portrait Background: In the center of the nail, paint an oval, circle or square shape as the background for your portrait. Use a neutral tone to help the art pop. Cure.
- Add the Hand-Painted Portrait: Paint your haunted portrait — a ghost, witch, skull, candle, graveyard, etc. — inside the shape. Cure.
- Matte the Entire Nail: Apply matte top coat to the entire nail, and cure. (Buff or wipe with alcohol if needed before applying chrome)
- Apply No-Wipe Gel for the Frame: Use a fine brush to outline the shape of your frame around the portrait using no-wipe black gel (or your chosen chrome base). Cure.
- Apply Chrome: Rub chrome pigment on to the cured no-wipe gel to create your metallic frame. Dust off excess pigment.
- Add 3D Frame Details (optional): Using 3D no-wipe gel, paint raised ornate details over the chrome frame for texture and dimension. Cure. Rub chrome pigment onto the 3D design. Dust off excess pigment. Apply a shiny or matte top coat to the whole nail or mix it up and make some elements matte and some shiny.
- Add Embellishments (optional): For a jeweled vintage frame effect, add tiny rhinestones or pearls onto the frame using gem gel or builder gel. Cure to secure.
Customizable Elements:
- Portrait Ideas: ghost, skull, candle, crow, moth, black cat, jack-o’-lantern, horror character, bat, X-ray, teeth (get creative!)
- Wallpaper Options: faded vertical stripes, vintage floral, cracked wall, tone-on-tone damask
- Frame Shapes: oval, ornate square, round, heart, a spooky shape?
- Chrome Colors: antique gold, pewter, black chrome, rose gold, oxidized bronze (chrome layered with gel paint)
- Extra Embellishments: 3D gel scrollwork, rhinestones, pearls, studs for a jeweled frame effect.
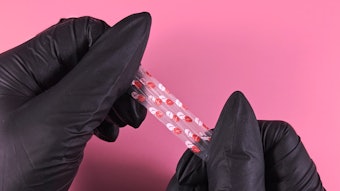
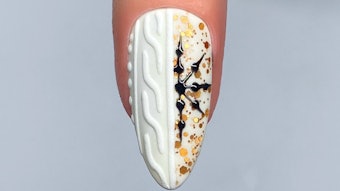
Hand-drawn Floating Eyeballs with Spiderwebs
Get creepy with these Halloween-core nails with a hand-drawn aesthetic. — Raquel Calixto
- Start with a white gel base. Apply two coats for full opacity, curing between each layer.
- Apply a matte top coat and cure fully.
- Prep the surface for artwork by wiping with alcohol or gently buffing — this helps your pen or paint glide better.
- Use a thin art pen (like a Pigma Micron) to hand-draw your designs. I sketched creepy floating eyeballs with web details.
- Let the ink dry completely (a few minutes) before moving to the next step.
- Add color and dimension using sheer red gel for the veins and eye accents, sheer black for shading, and a touch of white for highlights. Cure between each layer to build depth.
- Top coat with matte for that smooth, velvety finish.
Add gloss only to the eyeballs with a shiny top coat to make them pop and look extra lifelike.