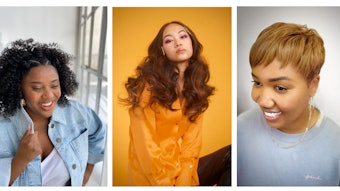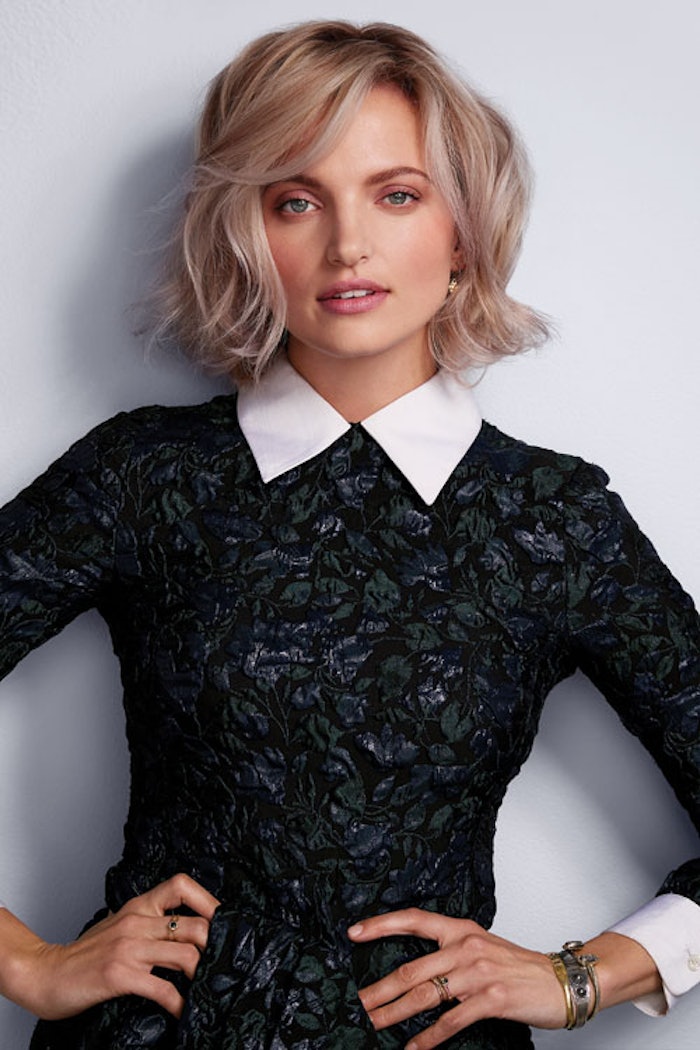
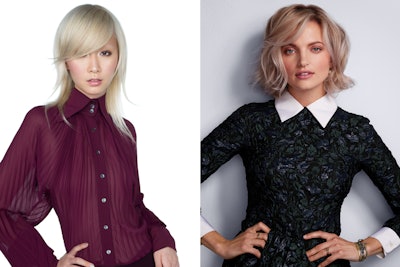
While a flawless blonde never goes out of style, the flaxen hue naturally goes hand in hand with the summer season. Here, we present favored blonde techniques from top pros.
Who: Thomas McWilliams for Rusk
*Model had existing Level 2 virgin hair.
The Technique:
1. Mix 1oz. Deepshine Brite White Powder Lightener + 2oz. 2-vol. Deepshine Shine Enhancing Cream Developer.
2. Begin applying at the nape using a virgin application, staying 1⁄4” away from the scalp, then bring the application down the mid-shafts and ends. Allow time for the mid-shafts and ends to lighten to a pale blonde. Then, re-mix in a new bowl, and apply to the scalp area and process until the haircolor at the scalp matches the ends.
3. Shampoo with Cleanse 01 Shampoo for Normal Hair.
4. Prior to toning, carve out three triangle sections: one fringe section and two sections in the back below both ears.
5. Mix .5oz. Deepshine Gloss 9N + .5oz. Deepshine Gloss 9G + 1oz. Deepshine Gloss Activating Lotion, and apply to the three triangle sections.
6. Mix .5oz. Deepshine Gloss 9A + .5oz. Deepshine Gloss 9N + 1oz. Gloss Activating Lotion; apply to the rest of the hair. Process for 15 minutes.
Who: Colin Caruso for John Paul Mitchell Systems
The Colors:
Formula A | .75oz. the color XG 8PA (8/81) + .75oz. the color XG 6PA (6/81) + .5oz. the color XG 8AA (8/11) + 2oz. 20-vol. Cream Developer
Formula B | 1 scoop Skylight + 1.5oz. 30-vol. Cream Developer Formula C | 1oz. the color XG 8PA (8/81) + 1oz. the color XG 7PN (7/80) + 2oz. 10-vol. Cream Developer
The Technique:
1. Apply Formula A to the base and feather down to ensure proper blending.
2. Process for 35 minutes and rinse well. Shampoo with Color Protect Post Color Shampoo and condition with Color Protect Conditioner. Dry hair.
3. Part hair down the middle. Starting at the front hairline just above the ear, take a diagonal back “V” section and hand-paint with Formula B. Continue to hand-paint in diagonal sections, adding lowlights with Formula C in every third section for depth. Continue up the head in “V” sections.
4. Move to the top segment. Beginning at the crown, take horizontal slices and hand-paint using Formula B. Paint the lowlight Formula C every three to four sections for dimension.
5. Process for 25 minutes or until desired lightness is achieved.
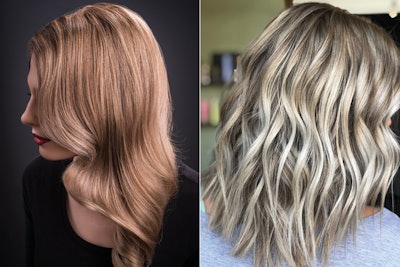
Who: Jacqueline Cefalu for CLiCS
*Model had existing Level 6 hair.
The Technique:
1. Lighten the natural base with equal parts CLiCS 8N + 30-vol. Developer. Process for 35 minutes, rinse thoroughly, shampoo, and dry.
2. Highlight the sides of the head, lower crown and top of the head with Crème Lightener + 20-vol. Developer. Lift to Level 10 (pale yellow).
3. Using Violet + 10-vol. Developer, tone at the shampoo bowl. Process for 10 minutes or until soft, neutral beige is achieved.
RELATED: Top Colorists Reveal Their Favorite Trends for Music Festival Season
Who: Kaylee Smiley for Keracolor
The Technique:
1. Apply Trionics KO Blondes lightener all over hair.
2. Apply 10-vol. Trionics Accent Enzyme Color Developer around the hairline.
3. Apply 20-vol. Trionics Actuator throughout the hair.
4. Use Keracolor Violet Toning Drops to tone.
5. Seal the shade with Keracolor Platinum and Silver Color + Clenditioners.
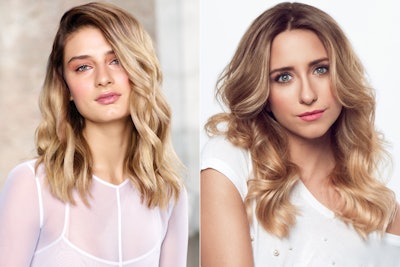
Who: Mila Belova for Matrix
The Colors:
Pre-Tone Formula | 1:1 Color Sync 5-Minute Fast Toner Anti-Brass + 10-vol. Cream Developer
Formula A | 1 scoop Light Master + 1 scoop Freehand Additive + 1oz. 30- vol. Cream Developer + BOND Ultim8
Formula B | 1:1 Color Sync Sheer Acidic Toner Nude + 10-vol. Cream Developer
The Technique:
1. Isolate the fringe area by creating a half-circle section. Section the rest of the hair into quadrants.
2. Working in 1⁄2” horizontal subsections and using meche to separate, heavily balayage Formula A from the mid-lengths to the ends. Lightly feather Formula A up toward the scalp area. Process until desired lightness is achieved or up to 50 minutes. Rinse thoroughly, then towel-dry hair.
3. Quickly apply the Pre-Tone Formula, thoroughly saturating strands. Process for 2 to 5 minutes, then rinse thoroughly. Re-section the hair into quadrants.
4. Apply Formula B section by section from scalp to ends. Process for up to 20 minutes, rinse thoroughly and towel-dry hair.
RELATED: Top Colorists Reveal Their All-Time Favorite Shade Techniques
Who: Mirza Batanovic (@mirza.batanovic) and Joanne Rempel for Eufora
*Model had existing Level 6 virgin hair.
The Colors:
Highlights Formula | AloeLite Blue Bleaching Pods + 10-vol. Universal Cream Developer (1:2)
Toner 1 Formula | 20g. EuforaColor No Ammonia 5.0/5N + 20g. EuforaColor No Ammonia 6.32/6GV + 80g. Toning Solution Developer + approximately 6g. (4 pumps) Color Elixir Professional Additive
Toner 2 Formula | 20g. EuforaColor No Ammonia 8.01/8NA + 20g. EuforaColor No Ammonia 10.3/10G + 80g. Toning Solution Developer + 6g. (4 pumps) Color Elixir Professional Additive
Toner 3 Formula | 30g. EuforaColor No Ammonia 10.3/10G + 60g. Toning Solution Developer + approximately 41⁄2g. (3 pumps) Color Elixir Professional Additive
The Technique:
1. Highlight hair as desired using the Highlights Formula. Rinse and gently shampoo (do not condition).
2. Towel-dry hair, then mist evenly with Fortifi Keratin Repair and comb through to balance porosity.
3. Apply Toner 1 Formula at the base and use your thumb to smudge toward mid-shafts.
4. Apply Toner 2 Formula through mid-shafts and blend with Toner 1 Formula.
5. Apply Toner 3 Formula to ends, blending between your fingers through mid-shafts. Process for up to 20 minutes.
6. Rinse thoroughly and seal with Color Elixir Professional Sealer.
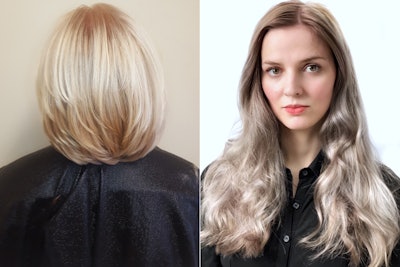
Who: Robyn Yvette Gates for Zotos Professional
The Technique:
1. Apply AGEbeautiful Permanent Color 10N + 9G + 20-vol. Creme Developer for the retouch (which was 70-percent gray on the model shown).
2. Create babylight accents on the crown of the head with AGEbeautiful Creme Bleach + 20-vol. Creme Developer.
3. Process for 30 minutes, starting at the end of the retouch application. No toner needed.
Who: Rebecca Hiele for Goldwell
*Model is natural Level 7NA with existing 9GB/10G mid- lengths and ends.
The Colors:
Background Formula | Equal parts Topchic 8CA @ PK + 6% Topchic Lotion
Formula A | 40ml. Colorance Lotion + 20ml. 8CA @ PK + 3 drops Cool Violet @Pure Pigments
Formula B | 40ml. Colorance Lotion + 5ml. 8CA @ PK + 15ml. 10V + 2 drops @Pure Pigments
The Technique:
1. Apply Background Formula at regrowth on all sections.
2. Alternate Formulas A and B in 1⁄2” subsections through mid-lengths and ends toward the bottom of the hair.
3. Apply Formula B solely through the top front section of the hair through the mid- lengths.
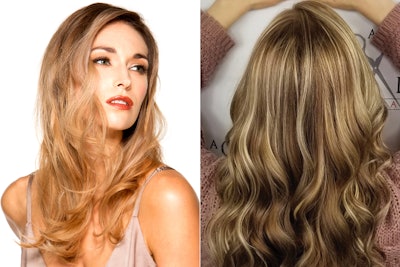
The Colors:
Base Formula | 1 part 5N + 1⁄2 part 7B + 7-vol. Enzyme Cream Activator
Pure Blonde Formula | 40-vol. Enzyme Cream Activator (for balayage)
Overlay Formula | Equal parts 9N + 9B + 9V + 7-vol. Enzyme Cream Activator (for toning)
Who: Carter T. Lund for framesi
The Technique:
1. Create Section 1 by tracing a diagonal line from the arch of the eyebrows meeting at a point at the center juncture.
2. Trace a diagonal line following the hairline from the arch of the eyebrow to the top of the ear, plus another diagonal line from the top of the ear to the point from Section 1 at the center juncture to create Section 2. Repeat the above steps for Section 3.
3. To highlight, slice and alternate hair in a bricklaying pattern in all three sections. Mix 1 part Decolor B Diamond Lightener + 1.5 parts 20-vol. Professional Activator and apply lightener to the Strike4 flat-iron processing sheet before placing the hair—this will help with control and saturation.
4. During application (close to the root area), feather the lightener upward to avoid a line of demarcation.
5. Starting in Section 1, begin your first Strike4 processing sheet placement, working from the front hairline back. Create your Strike4 placements taking 1⁄2” sliced partings, dropping 1⁄4” in between each placement, and alternating in a bricklaying pattern (there should be 10 total Strike4 processing sheet placements).
6. Repeat for Sections 2 and 3, following the diagonal placements (there should be 5 total Strike4 placements in Sections 2 and 3).
7. Once all 20 Strike4 processing sheets have been placed, flat-iron each Strike4 processing sheet at 340°F, tapping up and down twice, then slide toward the scalp with a light touch for 5 passes. As soon as your fifth pass is made, processing is complete.
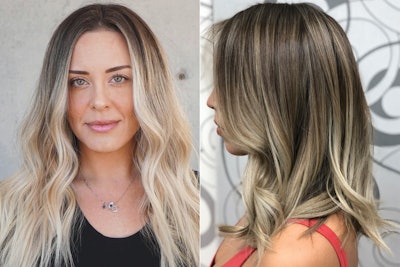
Who: Maggie May Hancock for Schwarzkopf Professional
*Model had natural Level 6 virgin hair, with demi color on the ends.
The Technique:
1. For lightening: Mix BlondMe and 7-vol. Developer (1:2). Apply onto backcombed sections 1” apart from each other, with 1⁄2” of drop-out. To ensure maximum lift, make sure to hold the section of hair flat on your palm to see your skin through the hair (this is how you know that the section is fine enough for the low-level developer to lift hair to high levels of blonde). Do this all over the head, leaving the hairline last to prevent breakage.
2. Slice a thin section of hair all around the face using your tail comb, and then tightly but lightly backcomb all of the hair and foil.
3. Make a 1⁄2” section around the area where the client parts her hair (if she doesn’t have a designated part, do it in the middle). Divide this rectangle horizontally into three sections. On the first, backcomb lightly and apply lightener all the way up as close to the scalp as possible. On the second section, lightly backcomb and apply lightener slightly lower and farther away from the scalp. On the third section, lightly backcomb and apply lightener even farther down than the last. Tip: This gives the client a blended root with gradual and thicker brightness toward the mid- shafts and ends of the hair.
4. After processing to desired lightness, rinse hair without getting the backcomb area wet. Brush out the tease using a WetBrush and detangler. (Note: Getting the teased area wet can cause serious tangles and make it extremely difficult to brush.)
5. For the melt: On damp hair, apply Vibrance 6-12 and 6-vol. Developer on the first 3” of hair to subtly blend out the tops of the highlights. On the mid-shafts, apply 7-1 and 8-0 with 6-vol. Developer. On the ends and hairline, apply equal parts 9-1, 9-5 and Clear with 6-vol. Developer. Process for 20 minutes.
Who: Luis Alcocer for ColorDesign
The Colors:
Formula A | 30g. SHINY BLOND + 45g. 20-vol. Developer
Formula B | 30g. Permanent Color 6.11 + 60g. 5-vol. Developer
Formula C | Toners—10g. 1SV + 10g. 1SG + 10g. Light Grey + 60g. 7-vol. Developer
The Technique:
1. Section hair into four quadrants: a center part from forehead to nape, and vertically from top of ear to top of ear. Utilizing Formula A, start applying foils in the back and create a horizontal parting at the top of the ear. Starting on the right, create three diagonal back foils parallel to one another, avoiding the hairline. Repeat on back left quadrant.
2. Above the occipital bone, place one horizontal foil with Formula A to ensure maximum coverage.
3. In the crown area, place three diagonal foils parallel to each other utilizing Formula A.
4. Move to the front of the head. Beginning on the right side, section out top from bottom, using the recession area as a reference.
5. In the bottom right section, place three diagonal back foils with Formula A that are parallel to one another. Repeat on the left side.
6. Process between 15 to 45 minutes or according to your lightening needs. Shampoo hair with Reconstruction Shampoo, and apply Reconstruction Oil for 3 to 5 minutes. Rinse.
7. Once hair is dry, utilize diagonal back partings and apply shadow base (Formula B) to the entire head, using ColorDesign’s elevation technique to soften lines of demarcation.
8. Starting at the nape, create a dimensional color melt between Formula B and Formula C throughout the head. Process for 35 minutes. Shampoo with Reconstruction Shampoo, rinse, and apply Reconstruction Mask for 5 minutes.
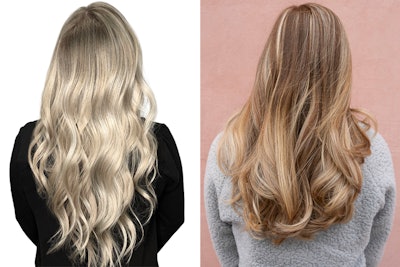
Who: Brett Atkinson for Celeb Luxury
The Technique:
1. Section hair into quadrants. Work diagonal back in each section.
2. Using 20-vol. developer and lightener of your choosing, alternate babylight and balayage sections.
3. Process hair until you reach a Level 9 or 10. Rinse.
4. Depending on the warmth of the hair, pre-tone with Gem Lites Flawless Diamond Colorwash. Flash-dry hair.
5. Section again into quadrants. Alternate using Gem Lites Flawless Diamond and Silvery Diamond Colorditioner in diagonal back sections. Let sit for 20 minutes.
Who: Wendy Bond for Lakmé
The Colors:
Base Break Formula | Collage 7/17 + 8/17 + 10-vol. Developer
Toner Formula | K.Blonde Pearl Toner + 0/00
The Technique:
1. Foil hair with K.Blonde Powder Cream Bleach using a ribbon-pattern technique.
2. Drop in vertical ribbons of lowlights.
3. Process for 15 minutes. During this processing time, mix the Base Break Formula.
4. Apply Base Break Formula between foils onto new growth, feathering into the rest of the hair.
5. Process for 15 to 30 minutes. During the last 10 minutes of processing, apply equal parts Gloss 10/20 + 0/00 + 6-vol. Developer through mid-shafts and ends.
6. Rinse between the foils. Shampoo and apply Toner Formula. Process for 10 minutes on damp hair. 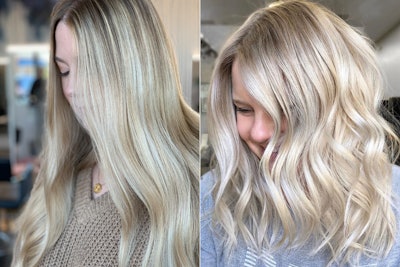
Who: Anthony Barnhill for Malibu C
The Technique:
1. Prep hair with Malibu C Un-Do-Goo Shampoo and Malibu C Crystal Gel.
2. Apply Oligo Professionnel Clay Lightener and 20-vol. Developer.
3. Process, rinse and halt oxidation with Malibu C Crystal Gel.
4. Gloss with Oligo Professionnel Calura Color P-12 along with demi developer through the mid-lengths and ends.
5. Apply Oligo Professionnel Calura Color 7-2 with demi developer at the roots.
6. Rinse, then condition with Malibu C Concentr8 Mixers Illumin8 and Rehabilit8.
Who: Noora Ahmad for #mydentity @Guy_Tang
1. Apply a mix of #Stroke7 Rosé Balayage Lightener + 40-vol. Thicc Activator (1:3).
2. After processing, wash and condition hair with #MyConfidant Shampoo and Conditioner.
3. Post-lightening (to achieve a pearl blonde), tone the hair while damp using X-Press Toners Sandstorm and Misty Mauve on the rootagé.
4. On mid-lengths and ends, mix with X-Press Toners Pearl and Clear.
This story first appeared in the June issue of Beauty Launchpad in The Colorist section. To receive the magazine, click here to subscribe.
[Images: Courtesy of manufacturers and artists]
