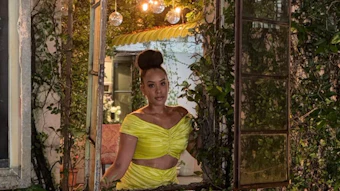
Artist: Vic Piccolotto, Australia | Makeup: Amy Howard | Photography: David Placek
Fashion Stylists: Shanel Regier, H(OM)E, L. Edgar Duff, Lauren Lein Ltd., TIV, Haji Couture, Veronica Riley Martens, Katrin Schnabl
(Click the page numbers below to see each step)
[pagebreak]

Step 1:
Structure Graphic: A graduated back and an asymmetric fringe combine with a solid form at the sides and a planar interior layer.
The left front hairline consists of shorter increase layers.

Step 2:
Section the front from the back using a steep diagonal part that extends over the crown to the back of each ear.
Section an off-center triangle from the left of the apex, to the middle of the left eyebrow and to the outside of the right eyebrow.
Get more hairstyle step-by-steps in INSPIRE Technical Guides • Get a FREE Technical Guide with each INSPIRE, the best-selling professional hairstyling books in the U.S. • Watch INSPIRE DVDs for more hair style how-tos

[pagebreak]

Step 3:
Begin at the nape with the head tilted forward. Release a central vertical parting, distribute perpendicularly, project at 45¡ and sculpt parallel.
Then take a pivotal paring on the left. Use perpendicular distribution and direct the lengths to the previously sculpted parting.
Repeat the same techniques on the opposite side.

Step 4:
Divide the upper back vertically in half. Take a diagonal-forward parting on either side.
On the left side, use perpendicular distribution, project at 45¡, position your fingers parallel and notch to slightly overlap the nape lengths.
[pagebreak]

Step 5:
Sculpt the parting on the right. Use the partings as stationary design lines.
Work to the top until you complete the back section.

Step 6:
Move to the top.
Release a horizontal parting at the back of the section.
Distribute the lengths straight up.
Use a length guide from the back and sculpt horizontally to establish a mobile design line.
[pagebreak]

Step 7:
Release a small section at the left side of the fringe and the top of the right side.
Use these lengths to determine the partings and length of the diagonal line to be sculpted.
Then release a diagonal parting and sculpt.
Work to the top of the section.

Step 8:
Starting on one side, take thick horizontal slices and position the palette comb away from the base.
Apply lightener with 20 volume (6%) developer as you pull the palette comb through to the ends.
Continue with the same techniques on either side and through the front.
Rinse, shampoo and dry the hair.
[pagebreak]

Step 9:
Take a medium diagonal slice in the fringe. Leave the hairline natural.
Apply the level 5, red-violet color with 20 volume (6%) developer from base to ends and enclose in foil.
Next, take a fine slice and apply lightener with 20 volume (6%) developer from base to ends.
Repeat these techniques.

Step 10:
Air form the fringe lengths, then apply a green accent color in back-to-back slices, encompassing most of the pre-lightened strands.
Process, rinse, shampoo and condition prior to styling.
[pagebreak]
Final Photos:


Get more hairstyle step-by-steps in INSPIRE Technical Guides • Get a FREE Technical Guide with each INSPIRE, the best-selling professional hairstyling books in the U.S. • Watch INSPIRE DVDs for more hair style how-tos