
I was inspired recently by my research on Betty Page. Sometimes, as a stylist, you create a movement out of sheer boredom. Geneva Cowen recently joked that she has cut over 1,000 side sweep fringes, and said that if she’s ready for a change, she can guarantee that her guests are too. She said, “A month ago I decided to let the hair hit the floor with the offer of a change. A guest’s quote that made me laugh was, ‘Ok, lets compromise and go in the middle of what you want and what I want.’ After three weeks she came in for a bang trim and decided to go where I wanted. I love it… and I knew it would happen sooner or later!”
A fringe change is a quick and easy way to offer long hair guests a dramatic change while keeping the length. And, every fringe can be adjusted to facial structure and texture, so it’s fun to customize it for each client.
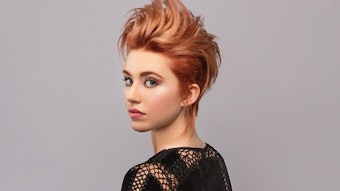
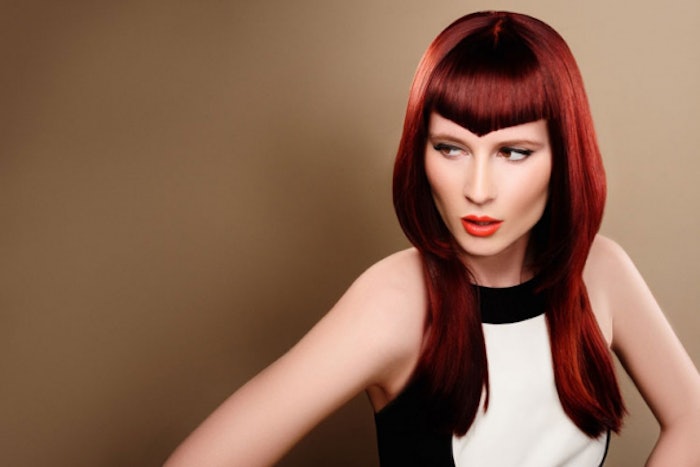
A hot tip for your guests with course texture or wave is to spot treat their fringe area with a relaxing treatment – Redken Steam Infusion is great for spot treating. This allows your guest a new look that may not have been an option otherwise. One of the new trend projections for 2015 is the V fringe - think Chevron. It can be approached dramatically, or for more conservative guests, the point can just be cut in softer.
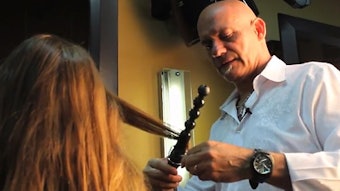
With all things, everything begins with an offer, so put it out there, take the challenge to ask your guests if they want something new. Remember, communication builds wealth, and a simple change gets clients inspired to tell others about you! I tend to cut fringe into dry hair, so natural texture and growth patterns can be taken into consideration when deciding on length. I also go for maximum visual contrast between the comb and hair to increase visibility – use black combs on lighter hair and ivory combs on darker hair. Use the wide end of the Sam Villa Signature Series Cutting Comb to pick hair up (in essence, the comb becomes your hand) and chip into hair with the Sam Villa Signature Series 7” Dry Cutting Shear. Cutting on dry hair allows the shears to cut through easier; the contrasting comb color helps define the cutting line, and holding hair in the wide-toothed end of the comb reduces tension on the hair, which allows for accurate judgment on length.

- Evaluate the hairline and look for hair growth patterns and cowlicks. If your guest has a strong cowlick, this fringe is not the best choice for them.
- It is essential to set the fringe area up properly with a blow dry. Use a Sam Villa Professional Ionic Blow Dryer and Signature Series Styling Brush and with the nozzle and brush, direct the hair from one side to the other (and “X” pattern). Continue going back and forth until the hair is dry and falls naturally.
- Section the fringe utilizing natural fall to create a triangle section. Ensure your section does not fall into the side area, and place your finger at the outer corner of your guest’s eye pointing up and use that as a reference.
- Place your comb in horizontally as a reference and cut a straight line beginning at the center to the outer area, repeating on the opposite side.
V Fringe How To:
- Evaluate the hairline and look for hair growth patterns and cowlicks. If your guest has a strong cowlick, this fringe is not the best choice for them.
- It is essential to set the fringe area up properly with a blow dry. Use a Sam Villa Professional Ionic Blow Dryer and Signature Series Styling Brush and with the nozzle and brush, direct the hair from one side to the other (and “X” pattern). Continue going back and forth until the hair is dry and falls naturally.
- Section the fringe utilizing natural fall to create a triangle section. Ensure your section does not fall into the side area, and place your finger at the outer corner of your guest’s eye pointing up and use that as a reference.
- Section the fringe down the center.
- Place your comb in at a diagonal pointed towards the center and cut a straight line. Repeat on opposite side.
If you have clients that still want to stick to the side swept fringe, check out these tips: http://youtu.be/IcrttT5XQHQ
When styling fringe, I like to dry the fringe area first - water breaks the hair’s structural bonds, so when fringe begins to dry, the bonds start to reform to their natural growth direction. By drying fringe immediately, the bonds reform to the shape we want them and it saves time. I also like to use the fine teeth of a comb instead of a brush when drying fringe with an erratic growth pattern – it gets closer to the scalp and provides more tension and control to redirect natural texture.
The great thing about fringe is it can breath new life into a client’s look who does not want a drastic change in the length or texture of their hair. And, it’s a great business builder because fringe keeps guests coming back for maintenance! Aspire for more, play around with fringe this season and have some FUN!
Aspire for MORE!
-Sam
Photo Credits
Photography: Shalem Mathew
Design: Geneva Cowen
Color: Mary Urban
Stylist: Mary Urban
Makeup: Maria Camacho
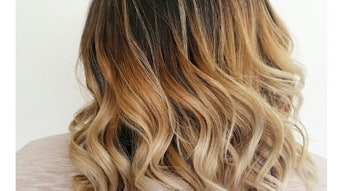
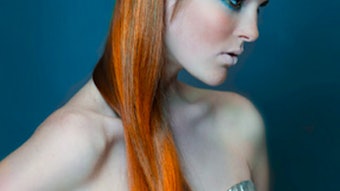
Color
Zone One: Redken Color Fusion 4RR 10 Volume
Zone Two: Redken Color Fusion 6RR 20 Volume
Block Color: Redken 1/2 oz Orange High Fusion and 1/2 oz 7C 30 volume
Fringe Detail: Redken Fusion 4RR 10 Volume